Project Settings & App Settings
In This Article
App Settings
App Settings apply to all projects within Slyyd. To reach them, tap on the three dots button in the upper right corner of the Project Browser. The ‘Settings’ tab should be pre-selected.
Default Intensity for Fixtures
Determines the intensity fixtures are set to when toggled on for the first time, or when toggled on after their manual values have been cleared.
Backup Files
Exports a backup of all projects within Slyyd. For more information visit the Sharing, Importing, & Backing Up a Project article.

Project Settings
The Settings tab of the Setup screen holds several useful project-wide settings. This is where the project can be renamed, where some default settings can be changed, where the project can be shared and duplicated, and perhaps most important, where a project’s Connections are managed.
Project Settings are reached by tapping ‘Setup’ on the bottom navigation bar while within a Project, then tapping the ‘Settings’ tab.
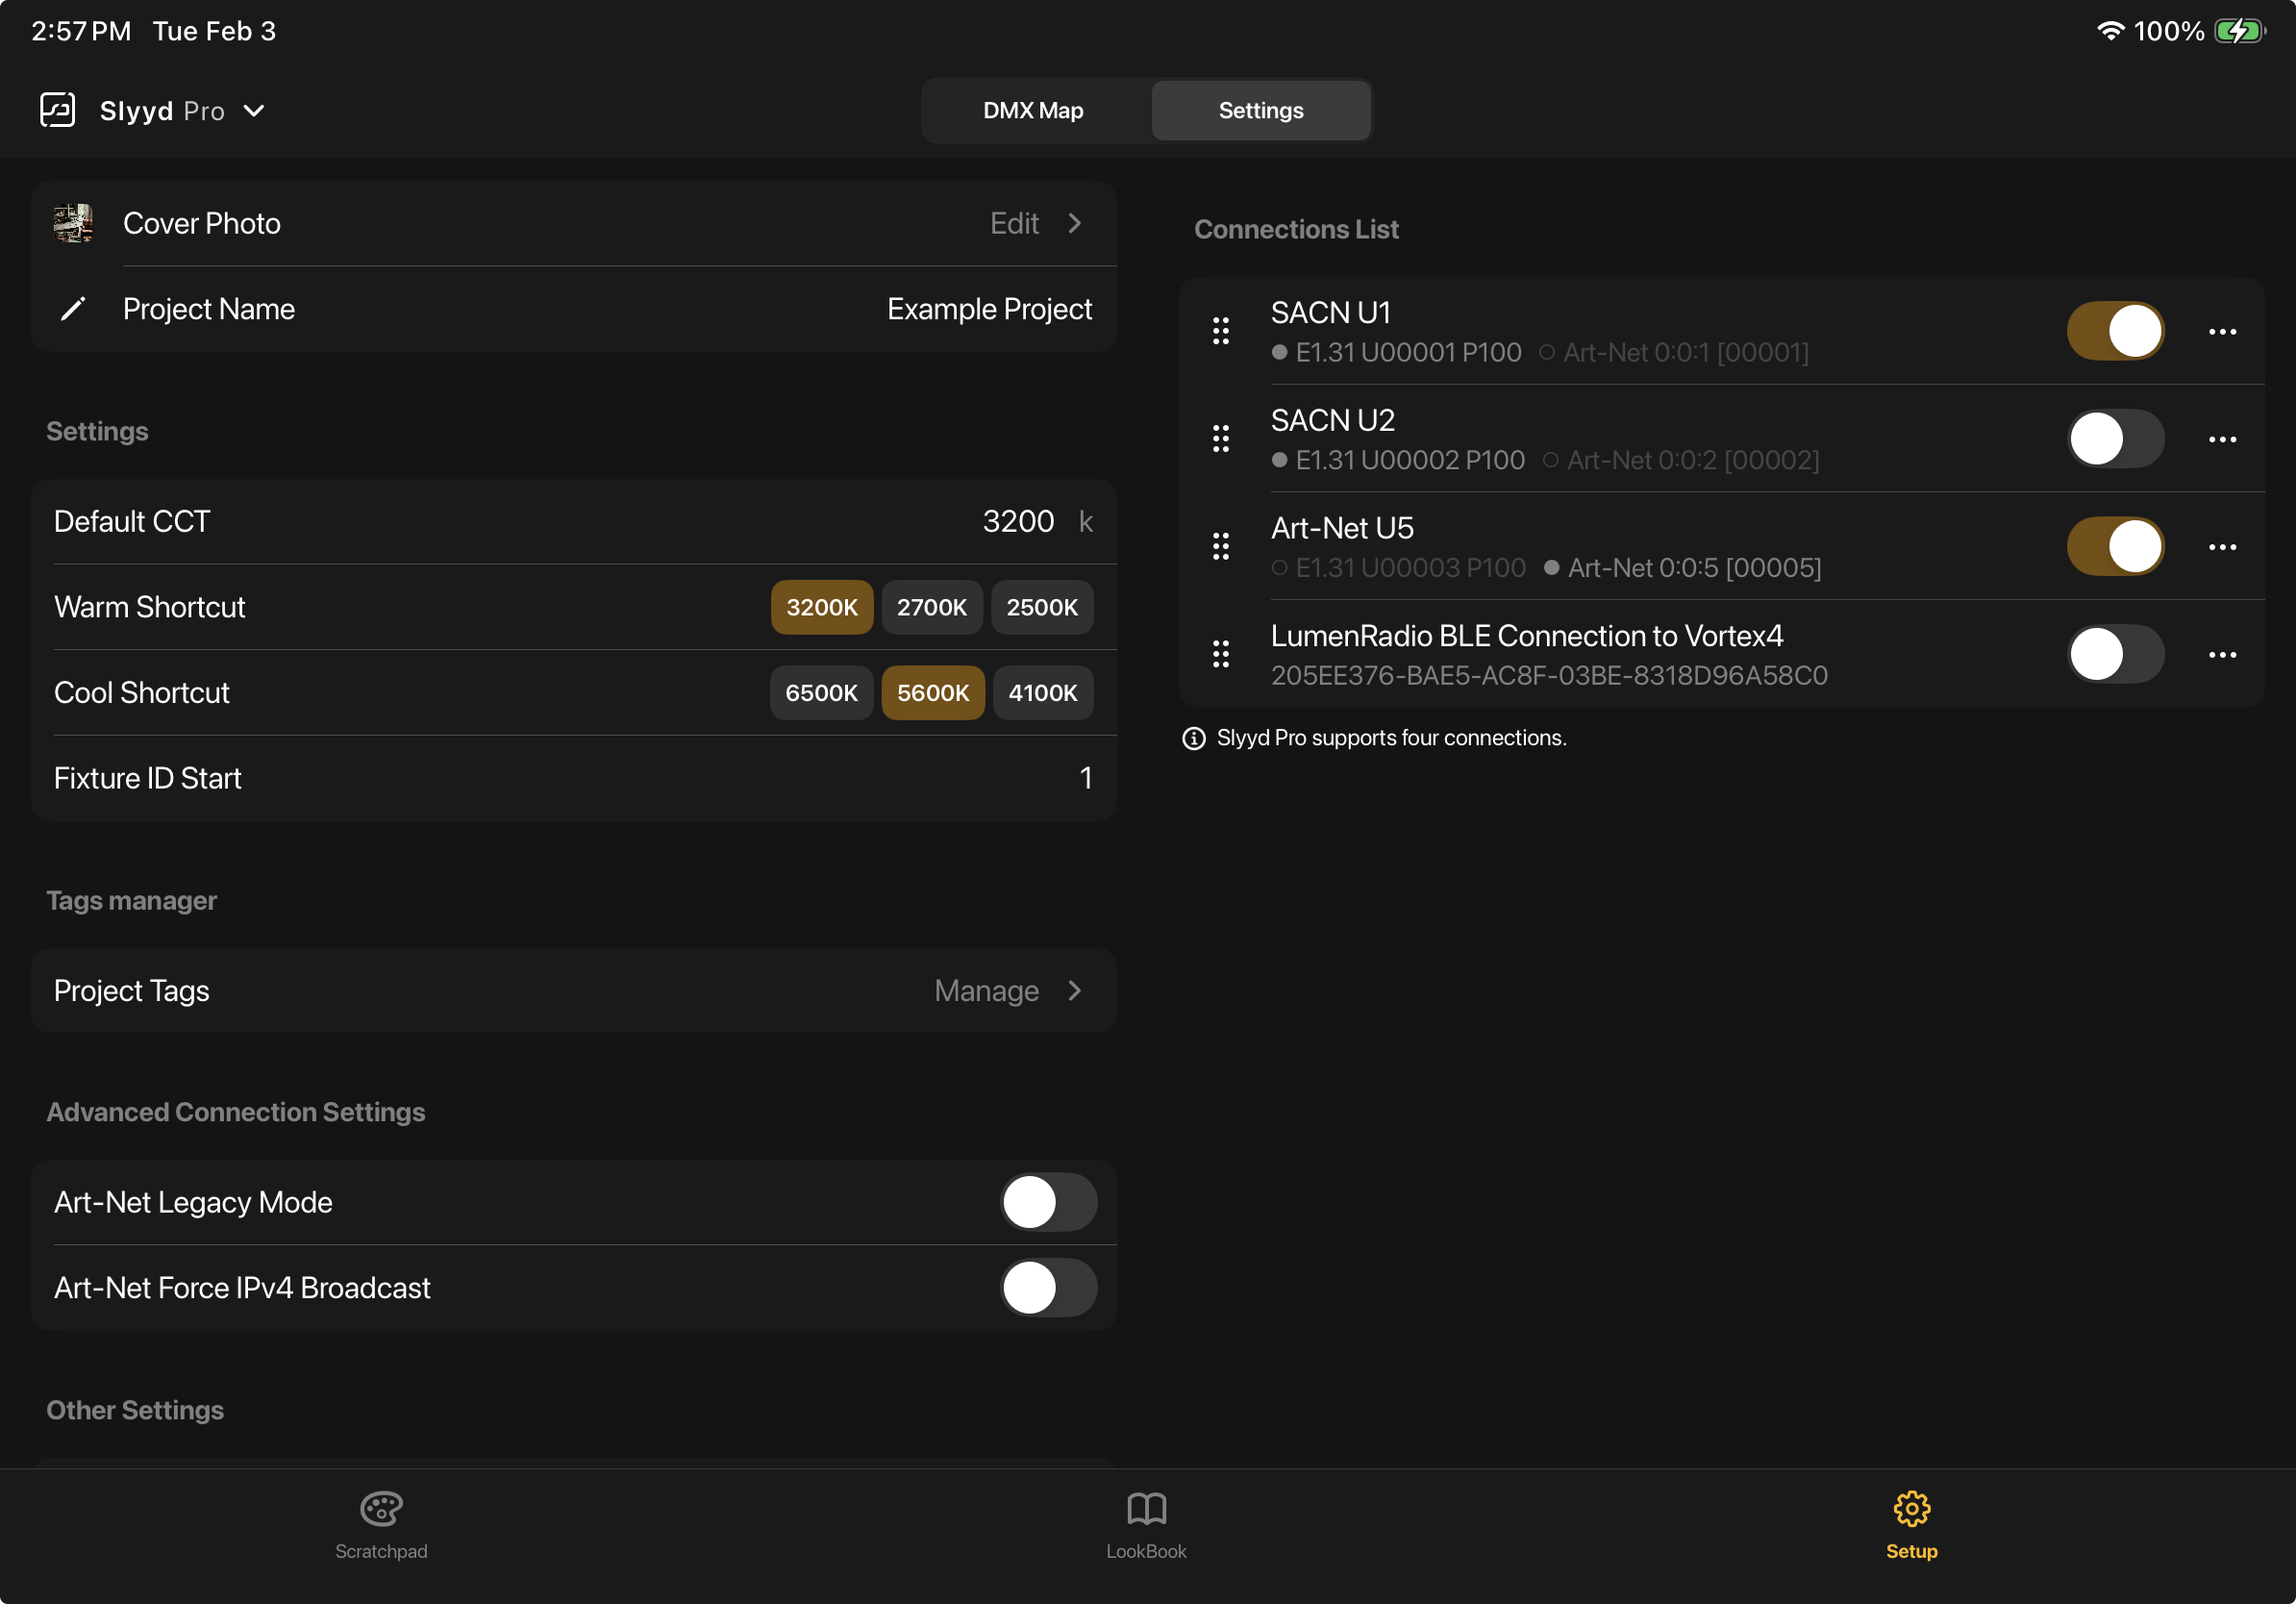
Connection List
This is where Connections can be added, removed, edited, and disabled. Slyyd currently supports two types of connections: Network type Connections for sending DMX data over a network using either sACN (E1.31) or Art-Net, and LumenRadio BLE Connections for sending DMX data over LumenRadio BLE to supported devices. Connections in the Slyyd App output 1 DMX universe per Connection.
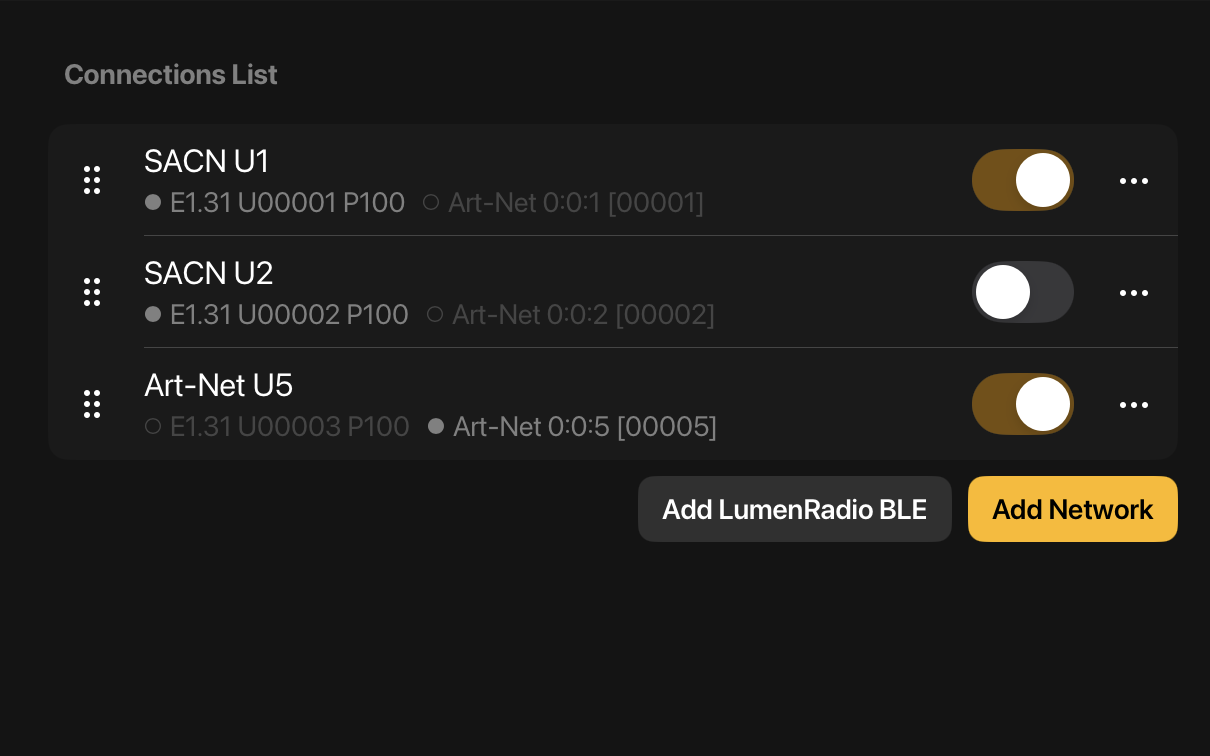
Adding a Network Connection
To add a Network type Connection, tap ‘Add Network’, then give the Connection a name, and choose whether to output sACN, Art-Net, or both.
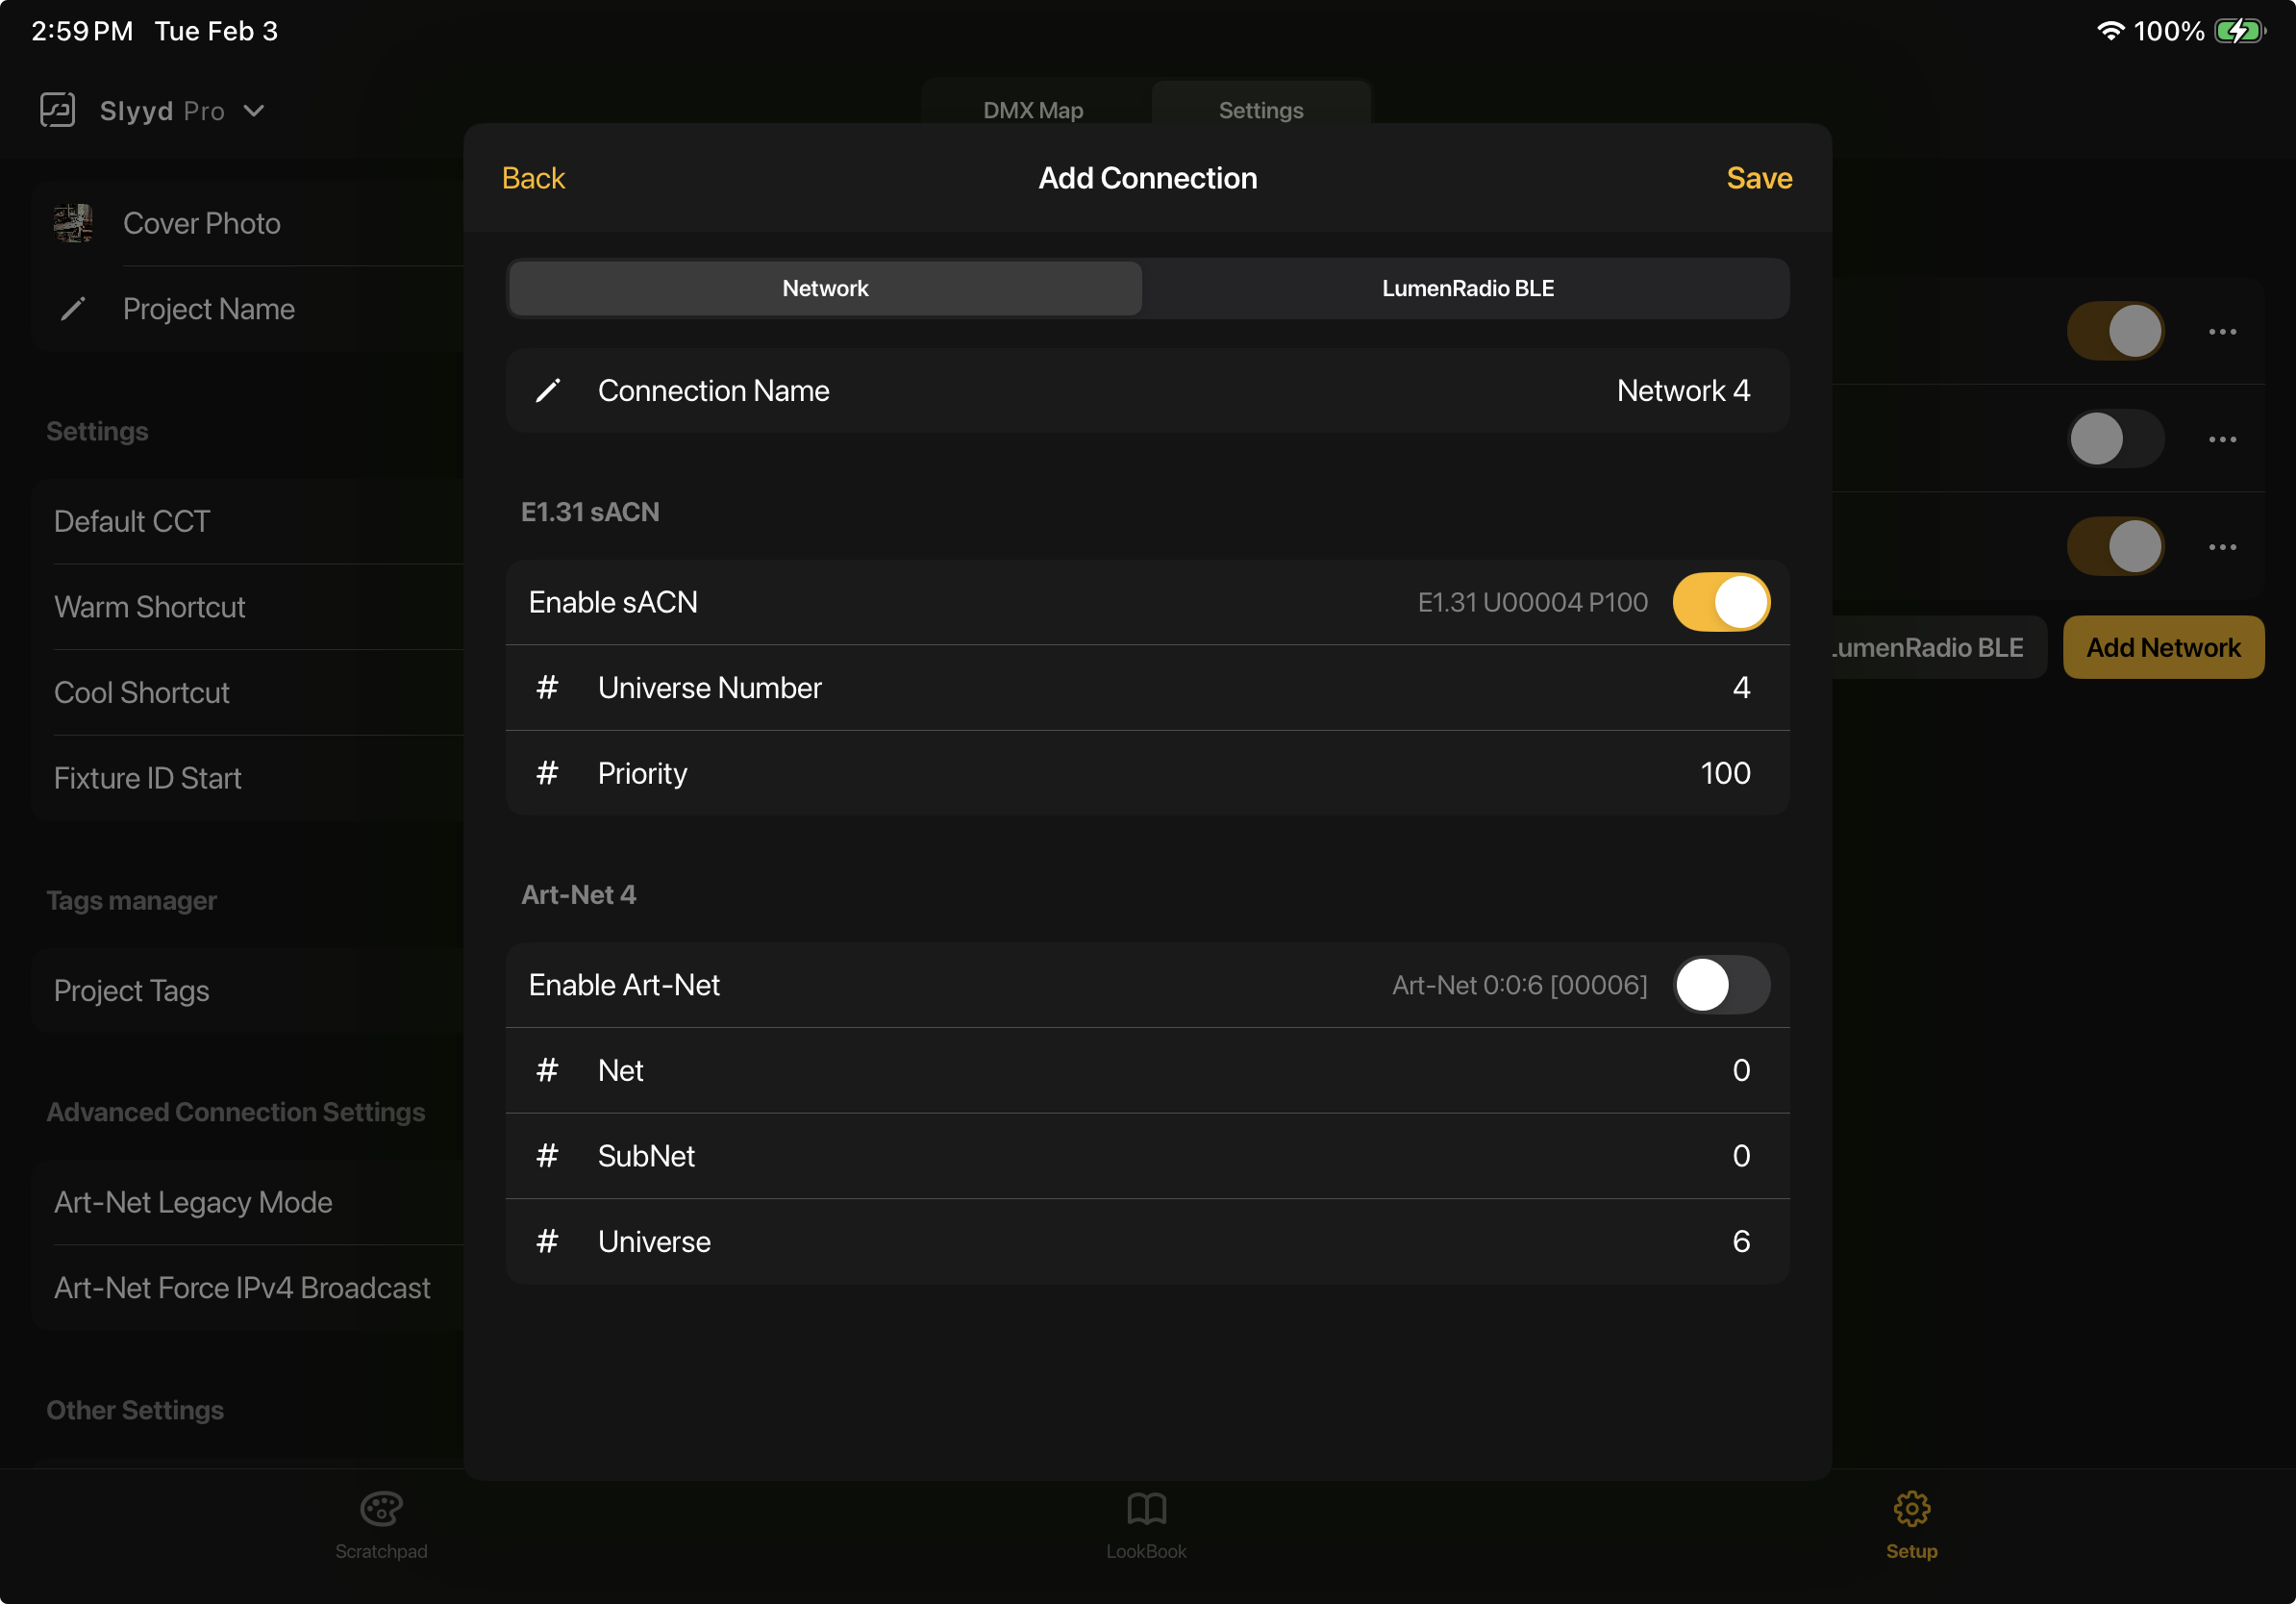
For more information on Network type Connections, see the Connections article.
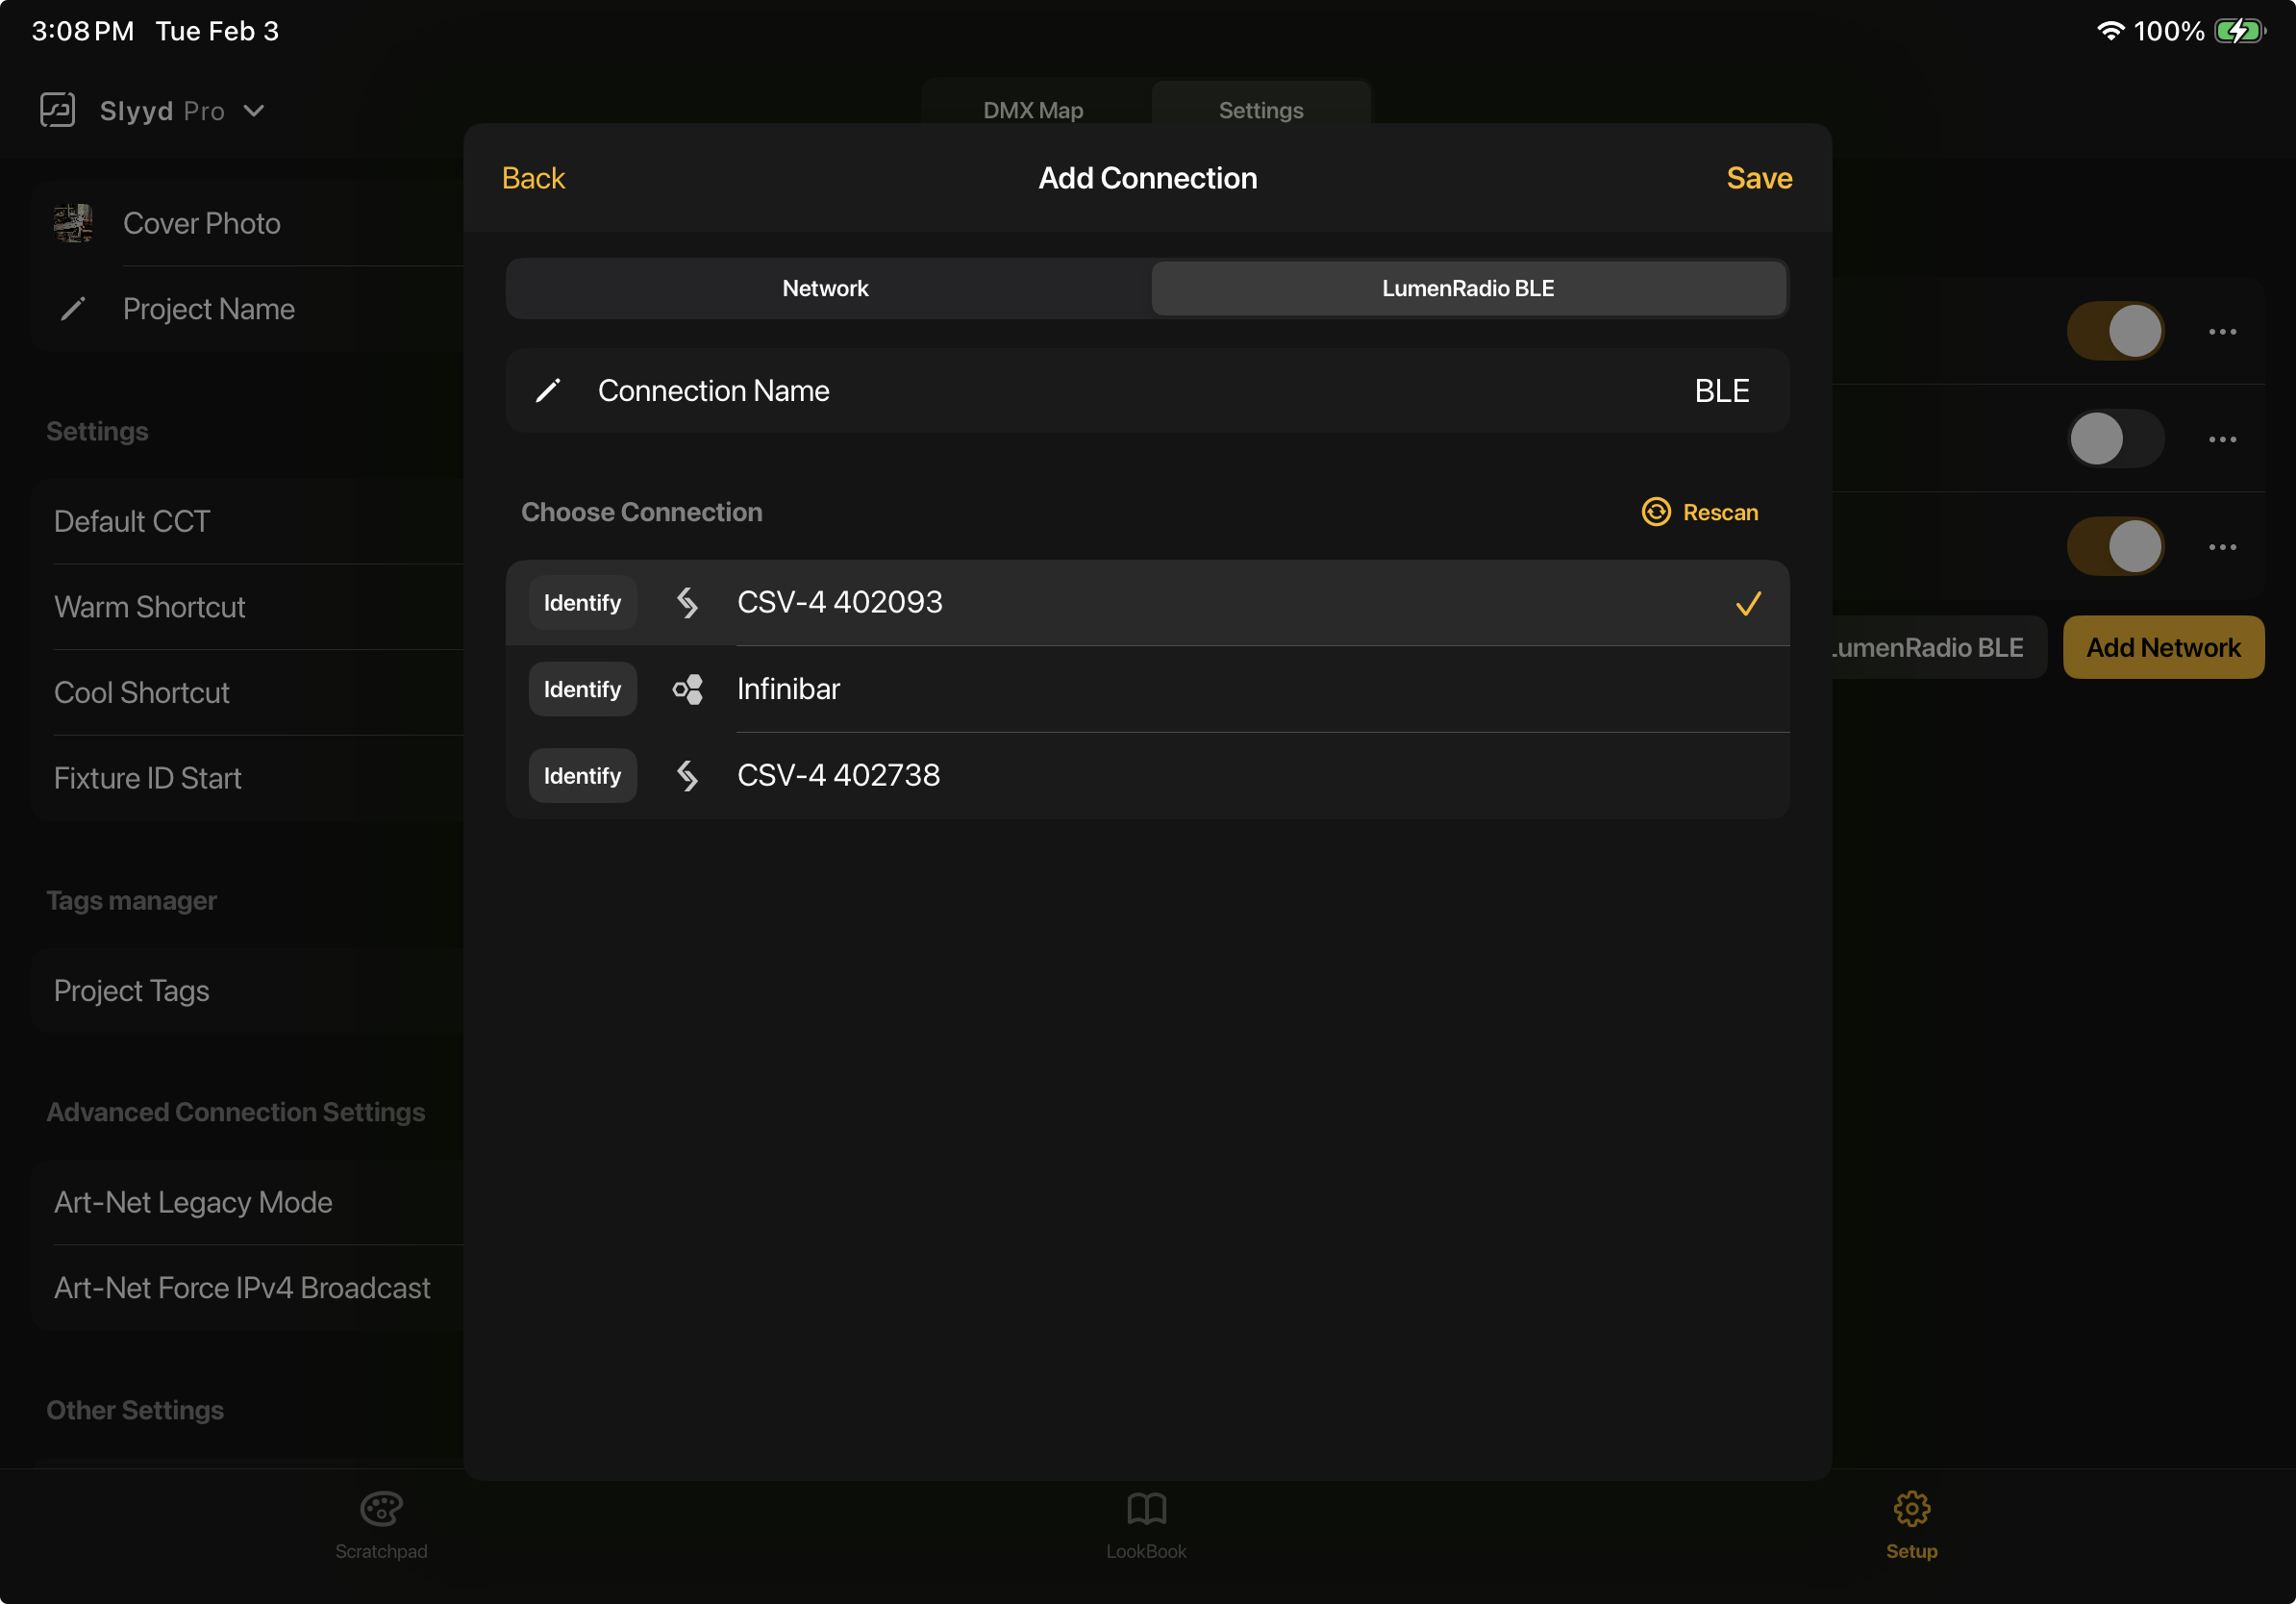
Adding a LumenRadio BLE Connection
To add a LumenRadio BLE Connection, start by making sure LumenRadio BLE is enabled on the receiving device, then tap ‘Add LumenRadio BLE’. If the device is on and listening, it should appear in the list below.
If multiple devices are found, the Identify button can be used to flash the selected device (if it’s capable of flashing).
To finish creating the Connection, select the desired device and tap ‘Connect’.
Editing and Deleting Connections
To edit a Connection, tap the three dots button to the right of the Connection and choose ‘Edit’. The ‘Delete’ button can be found in the same place but note that a Project must have at least 1 Connection. Deleting the only Connection is not permitted.
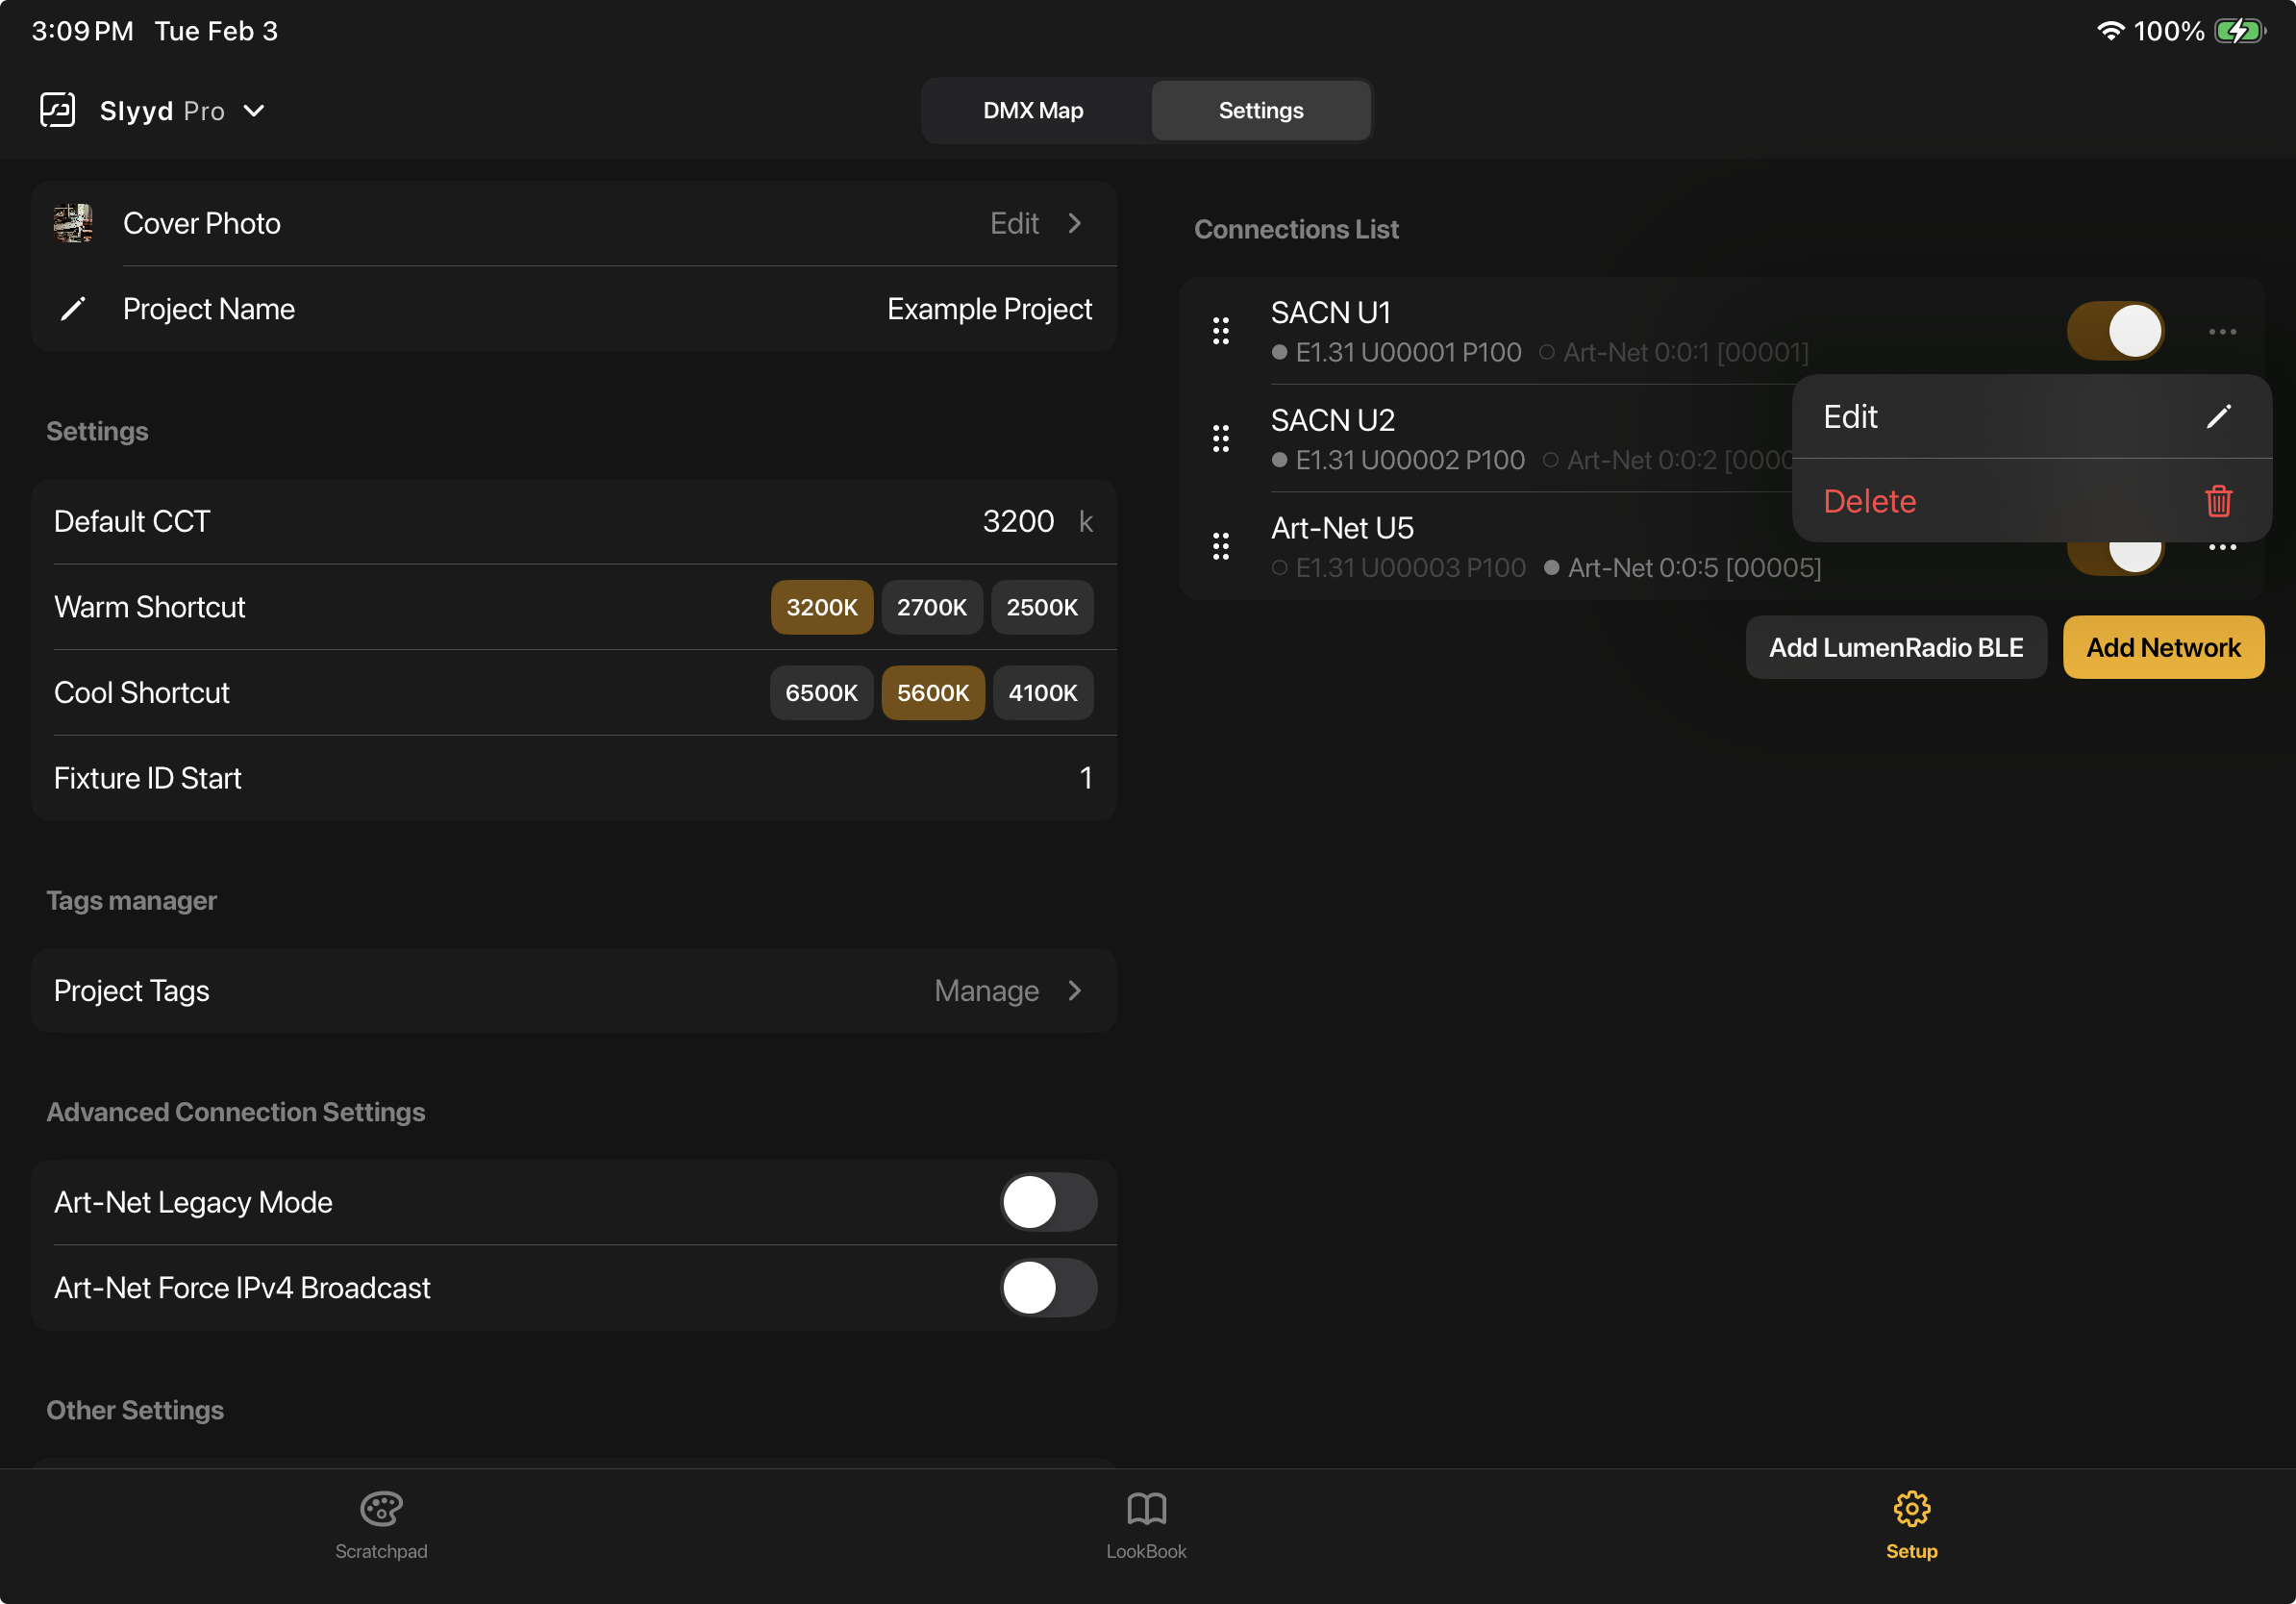
An sACN Connection can be turned into a LumenRadio BLE Connection, and vice versa, using the Edit screen. A new BLE-capable device can also be selected if the original is unavailable/inconvenient, or when attempting to heal a broken BLE Connection that was shared from a separate device.
Cover Photo
Adding a Cover Photo provides a visual way to remember a Project. To add a Cover Photo tap ‘Add’ and choose a photo.

Settings

Default CCT - The initial color a color-capable fixture is set to, and the color it returns to when color is cleared on the Scratchpad. If a fixture is not able to achieve the Default CCT, it will be set to the closest CCT value possible.
Warm/Cool Shortcuts - Determines the shortcut values available underneath the color temperature slider on the Color Picker.
Fixture ID Start - The first auto-filled Fixture ID when patching multiple fixtures. Change this value when patching many fixtures that want to have sequential Fixture IDs that do not begin with 1.
Tags Manager
The Tags Manager can be accessed from the Settings screen. For more information on the Tags Manger, visit the Tags article.
.png)
Advanced Connection Settings
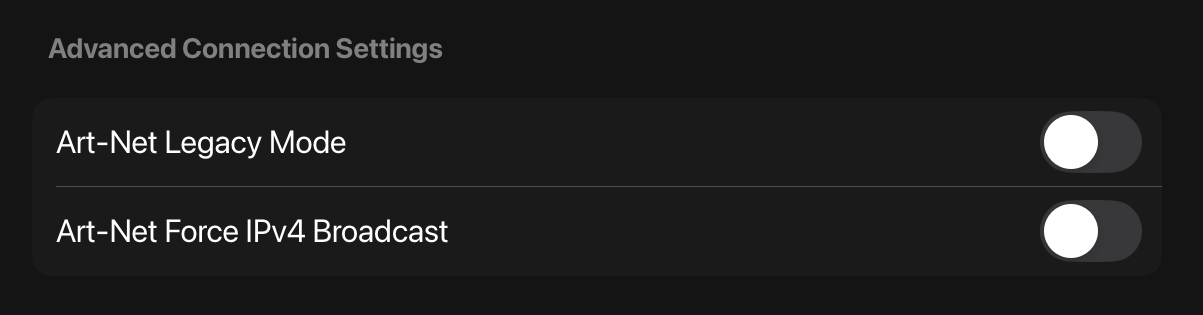
Art-Net Legacy Mode - Disables ArtPoll and ArtPollReply packets, and forces broadcast of all Art-Net universes. Increases network traffic, but can be helpful when troubleshooting, or as a workaround when dealing with older hardware.
Art-Net Force IPv4 Broadcast - Forces all Art-Net universes to broadcast instead of unicast. Increases network traffic, but can be helpful when troubleshooting, or as a work around when dealing with network issues.
Other Settings

Share -Used to save the project as a file for sharing or backing up. For more information visit the Sharing, Importing, & Backing Up a Project article.
Duplicate - Duplicates a project with a new name.
Delete - Deletes the currently open project. This action cannot be undone.
